Browsed by
Author: Kevin R Keegan

New Free Source for XPlanet Cloud Map

New Free Source for XPlanet Cloud Map

Sadly the Dundee Receiving Station is gone.

They announced over a year ago that their funding had not been renewed and sadly it looks like it has come to an end. For many of us Dundee was the source for geostationary cloud images of the earth that we have used to generate World Maps with Realtime Cloud Data:
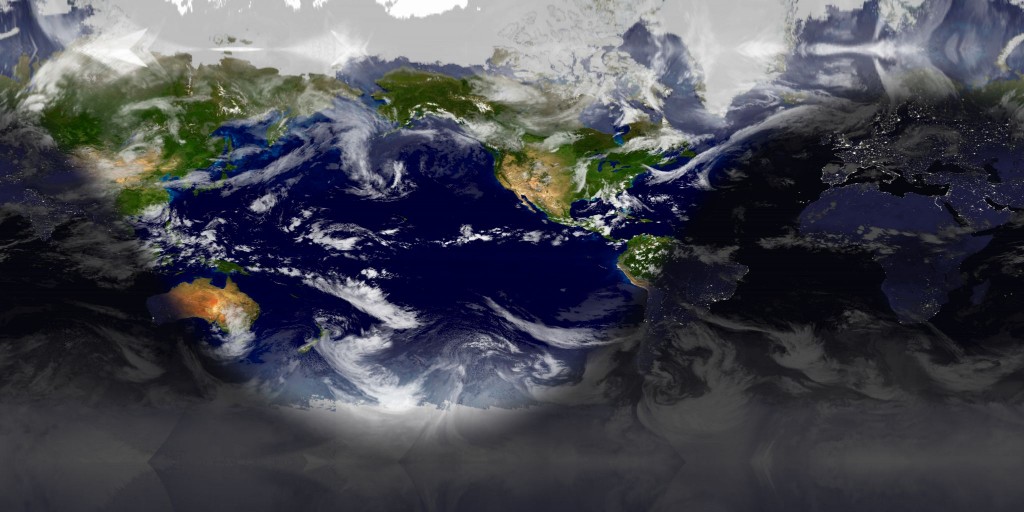
Realtime Clouds – but with some stitching artifacts near the polls.

In searching for a new source I discovered the RealEarth project by the Space Science and Engineering Center (SSEC) at the University of Wisconsin-Madison. It is fantastic! This project provides for a nice well defined API to access image tiles of the earth, including cloud maps updated hourly. These image tiles are already in equirectangular projection, so their is no need to align and map them onto a sphere.

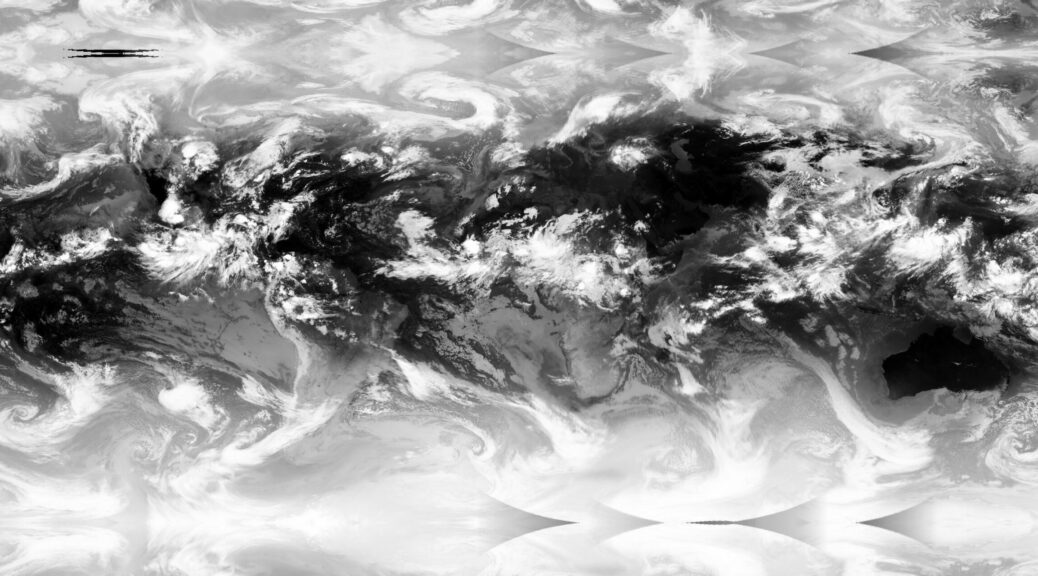
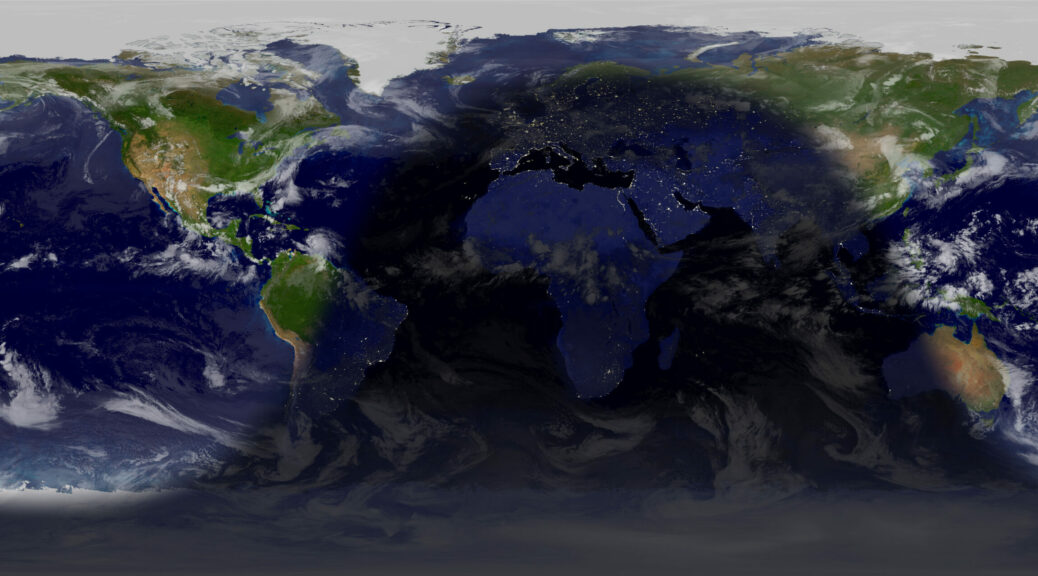
Once you download all of the image tiles and stitch them together the resulting image is higher resolution, with no discernible artifacts, and updated 3x more frequently than using the Dundee images the CreateCloudMap.

Using the highest resolution imagery, it does require downloading 512 image tiles. However, as I said, their API is fantastic and I was able to throw together a very simple python script that automates the downloading and stitching. The script outputs a single 8192×4096 cloud map. Here is a sample:
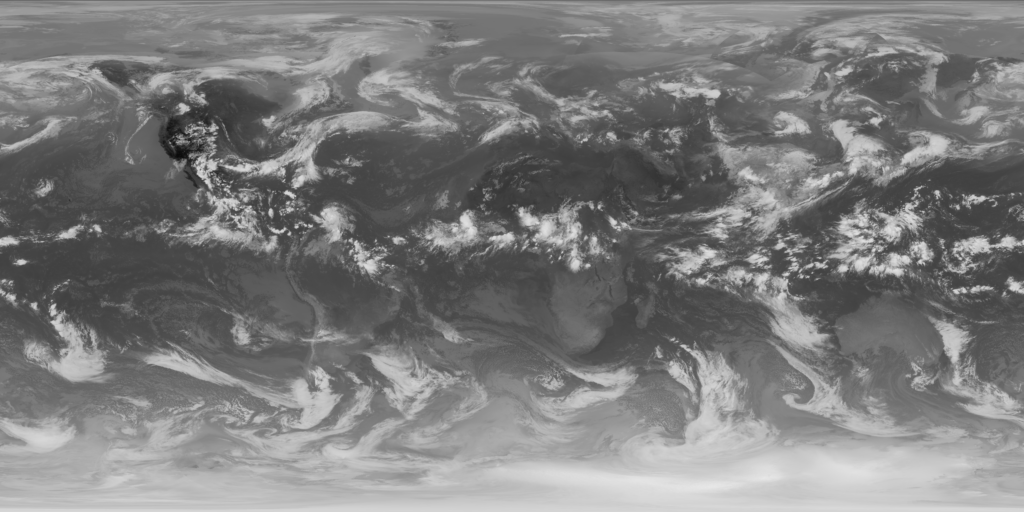
Now Higher Resolution and With Fewer Stitching Artifacts!

As you can see, this has much fewer stitching artifacts. It also relies on more satellites to get even better detail. The resulting World Map is the first image in this article.

Getting the full size image does require signing up for an API key if you want to download the image once per hour. Otherwise you will exceed the non-API data cap. If you are satisfied with a 4096×2048 image, you can download this once per hour without exceeding the cap for non-API users.

The python script for generating hourly cloud maps for xplanet is here. It is open source, so feel free to contribute.

A Note About a Paid Source for Cloudmaps

I am aware that xPlanet redirects its users to a paid source for obtaining cloud maps. I won’t link to the service here because I find them to be unethical. I understand that hosting and bandwidth cost money, but this service charges $100 per year for access to the same free cloud maps you can obtain yourself.

The resolution they offer is the same, and the frequency is the same. They are taking a free product, hosting it on their web server and charging you $100 for it. This is unjustifiable robbery. I also find it a bit icky that an open source project is redirecting its users to a paid resource that is so patently a money grab.

Thank You Jmozmoz for Cloudmap

The Create Cloud Map Library by @jmozmoz was awesome. You can read more about how it worked here. Sadly with the end of Dundee and RealEarth providing an already projected image, there is no longer a need for the library. It was however a great tool for many years. I learned a lot about how coordinate systems work while tinkering with it.

Thank you.
Technical Inspection of Insteon Hub2 2245-222

Technical Inspection of Insteon Hub2 2245-222

The following are some notes I gathered while investigating the technical possibilities of the Insteon Hub2.

Starting Nmap 6.40 ( http://nmap.org )
Nmap scan report for 192.168.XXX.XXX
Host is up (0.00058s latency).
Not shown: 65535 open|filtered ports, 65531 filtered ports
PORT STATE SERVICE
23/tcp open telnet
443/tcp open https
992/tcp open telnets
25105/tcp open unknown
MAC Address: 00:0E:XX:XX:XX:XX (Smarthome)

Nmap done: 1 IP address (1 host up) scanned in 2306.43 seconds

I can connect to both telnet ports, but all I get is a blank screen that doesn’t seem to respond to any commands.  It also doesn’t seem to broadcast the buffer contents.

After a lot of futzing, I was able to connect to the https 443 port.  It uses the deprecated RC4-MD5 cipher and a self-signed certificate.  You will also need to use Basic Auth and the username and password.  Once in, the webpage looked identical to the one described below, I was unable to determine any other benefits of this port.

The 25105 port is configurable.  It is a basic http port that requires Basic Auth using the username and password printed on the bottom of your hub.  The default webpage is very basic, with a link to http://connect.insteon.com and the product manual and support pages.

There is some rudimentary available at this port.  It is rather crudely documents (as is Insteon’s style) here: http://cache.insteon.com/developer/2242-222dev-062013-en.pdf.  See pages 6-10.  Note that this document is actually for the Hub1, I have yet to find any developer notes for the Hub2.

The buffstatus.xml page provides access to the incoming messages for the Hub2.  Of note, the Hub2 has a 200 character buffer not the 100 listed for the 2242-222.  Also, undocumented is the final two characters of the buffer.  These turn out to be a hexadecimal representation of the last position written to.  Essentially, the incoming messages are written left to right and when the 200th position is reached it goes back to 1.  The characters are never cleared (unless you call a special command to do so) but are merely overwritten.

It is possible to poll the Hub2 about twice a second and to use the buffer to see all of the messages received by the Hub2.  This seems to work rather reliably, and the constant polling doesn’t seem to upset the device.

I am not aware of a way to see outgoing messages.

The interface also allows for sending of some messages.  See the http://xxx.xxx.xxx.xxx:25105/3?YYYYY=I=3 documentation in the above pdf.  This seems to provide an interface to communicate with devices from the hub.   However, as of yet, I am not able to communicate much if at all with the hub using this interface.  As a result, I am unable to scan the hub’s link table.  Update: Figured it out.  So far all of the common PLM commands seem to work with the 3?<CMD STR>=I=3 style message.  But, anytime a 3?<CMD STR>=I=3 style message is sent, the buffer is zeroed out and the buffer position is reset to 00.

Finally, I took a TCPDump of the Hub2.  Best I can tell, the Hub2 doesn’t open any outside ports on my router.  This is contrary to the claim that it does “automatic port forwarding.”  This is probably for the best security-wise anyways.

Instead it appears that the Hub creates a persistent connection to insteon.pubhub.com (hosted on Amazon Ec2).  Poking around http://www.pubhub.com confirms this.  The communication is all SSL encrypted.  I thought about placing a man-in-the-middle and trying to decode this messaging, but I doubt it would be much help.

Generate High Quality Cloud Map for XPlanet

Generate High Quality Cloud Map for XPlanet

I have really enjoyed my world map with realtime clouds. I use it as the background on my phone (updated hourly) and as the desktop on many of my computers as well.

However, my initial instructions relied on a rather low resolution version of the cloud maps. Luckily I found the CreateCloudMap python library from @jmozmoz that uses images from the Dundee Receiving Station. The whole process is quite interesting. The ingested images are full disk images of the cloud cover taken from 6 different geostationary weather satellites. Those images are then projected onto a sphere, stiched together, and then projected back out as a Mercator projection.

The resulting cloud map can be updated every three hours (limited by the image time periods offered by Dundee). The cloud map is perfect and is much higher resolution than the prior version.

You do have to sign up for an account with Dundee, but it is free.

Update: This is a good description of how the library works.

World Sunlight Map with Real Cloud Data and Accurate Seasons

World Sunlight Map with Real Cloud Data and Accurate Seasons

earth For a long time I have used an image similar to this one as the background on my phone.  The image accurately represents the current cloud formations and sunlight regions on the planet.  I came up with the idea from the following page: http://www.die.net/earth/.  There is a good explanation on how to do this at http://www.die.net/earth/how.html, so I won’t repeat it here.

If you want to purchase an expensive wall hanging version of this map amazon will sell you one for $3000+, Boardroom Sunlight Map.  Although it seems to me that you could purchase a Flat Screen TV and a Raspberry Pi and save yourself $3000, but hey, that is just me.

For a few years, I have used a Tasker profile on my Android phone to download a copy of this image once an hour.  Tasker then updated the background on my phone.  I find the image to be both beautiful and at least marginally functional.  Plus I enjoy the nerdiness of it.

A few months back I switched to a Nexus 4 and discovered that the image available from die.net was lower resolution that my phone.  This gave my the impetus to “roll my own” customized version.

I doing so I discovered the beautiful series of Blue Marble images that NASA has made available.  The The Blue Marble: Land Surface, Ocean Color and Sea Ice image was by far my favorite, but I noticed that NASA has since added monthly images that more accurately represent the snow pack and foliage for each month of the year.  Unfortunately, these images seem darker, and less vibrant than my favorite image.  Specifically, the greens and browns of the land masses looked very dull.  Additionally, the ocean was much more black and devoid of any character.

Luckily NASA aligns the images very precisely.  I first downloaded each monthly image and tweaked it in darktable.  I increased the exposure value to make them brighter, and increased the color saturation of the greens, browns and oranges.  The resulting images were much more vibrant.  Then to fix the ocean, I simply placed my favorite image into Gimp and overlayed the new images with a mask for the ocean over them.  The results were spectacular.

Then I simply added 12 different config files for xplanet and made 12 different cron jobs depending on the month.  Now I have my own custom World Sunlight Map with more accurate seasonal representation of the land mass.

A Temperature Controlled Whole House Fan with MisterHouse

A Temperature Controlled Whole House Fan with MisterHouse

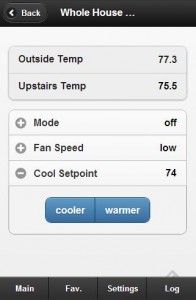
MisterHouse Web Interface for a Temperature Controlled Whole House FanThe main feature of MisterHouse that sets it apart from other home automation systems is the ability to customize practically every aspect of the system.  The following example is a perfect demonstration of this.

I recently purchased a whole house fan, basically a giant fan that sucks hot air out from the highest point in my house. They are great if you live in a climate with cool nights.

The controls for my fan were very basic, an on/off switch and a two-speed setting.

With Misterhouse, I created an “auto” mode which will only turn on the fan if both the indoor temperature is above a defined threshold and the outdoor temperature is 5 degrees below the indoor temperature.

This is how I did it.

Starting Materials
– A Whole House Fan
– 2 IOLincs, (1 for on/off, 1 for fan speed)
– A MisterHouse enabled indoor temperature sensor (I used my Insteon Thermostat)
– A MisterHouse enabled outdoor temperature sensor (I used data from a neighbor’s weather station through weatherunderground)

I created the following items in my mht file:

GENERIC, house_fan, HVAC|WHF_Group
GENERIC, house_fan_temp, HVAC|WHF_Group
GENERIC, house_fan_setpoint, HVAC|WHF_Group
GENERIC, house_fan_ambient, HVAC|WHF_Group
INSTEON_IOLINC, DE.AD.BE:01, whf_main, HVAC
INSTEON_IOLINC, DE.AD.BE:01, whf_speed, HVAC

I also had the following items already setup:

$upstairs_thermo_temp #the temperature upstairs
$w_temp #the outside temperature

First, I set the available states for my generic objects:

$house_fan-&gt;set_states('on', 'off', 'auto');
$house_fan_speed-&gt;set_states('high', 'low');
$house_fan_temp-&gt;set_states('cooler', 'warmer');

Then I tied my generic items to my Insteon Devices:

$house_fan-&gt;tie_event('$whf_main-&gt;set("on")', "on");
$house_fan-&gt;tie_event('$whf_main-&gt;set("off")', "off");
$house_fan_speed-&gt;tie_event('$whf_speed-&gt;set("on")', "high");
$house_fan_speed-&gt;tie_event('$whf_speed-&gt;set("off")', "low");

Then I tied my Generic temp item to my Generic setpoint item, and inserted some custom code:

$house_fan_temp-&gt;tie_event('house_fan_temp_change($state)');
sub house_fan_temp_change {
	my ($state) = @_;
	if ($state eq "warmer"){
		$house_fan_setpoint-&gt;set(int($house_fan_setpoint-&gt;state) + 1);
	} elsif ($state eq "cooler") {
		$house_fan_setpoint-&gt;set(int($house_fan_setpoint-&gt;state) - 1);
	}
}

By doing this, I can have a nice cooler and warmer button in the web panel.

Finally, every minute I check to see if the device is in “auto” mode and whether or not it should turn on:

if ($New_Minute){ 
	if($house_fan-&gt;state eq 'auto') {
		if (int($upstairs_thermo_temp-&gt;state) &gt; int($house_fan_setpoint-&gt;state) &amp;&amp;
		(int($upstairs_thermo_temp-&gt;state) - 5) &gt; int($w_temp-&gt;state)) {
			if ($whf_main-&gt;state eq 'off') {
				::print_log("[a1housefan.pl] Auto: Turning on fan");
				$whf_main-&gt;set("on");
			}
		} else {
			if ($whf_main-&gt;state eq 'on'){
				::print_log("[a1housefan.pl] Auto: Turning off fan");
				$whf_main-&gt;set("off");
			}
		}
	}
}

The result, is a temperature controlled whole house fan.  The image above is a screen shot from my web interface.